
IN THE WORKSHOP - The German Iron Cross.
As a minimum you must have looked at the following pages before reading these instructions:
Objective of this workshop.This workshop is here to show you the actual process of using masks on a live model.
You will see the painting procedure for the Iron Cross to the surface of a YT International Messerschmitt ME109 wing. Colour order is white followed by black which is not the normal (correct) way to achieve this.
Using a quality branded paint such as Klass-Kote which has high pigment levels, you should paint black then white! ( I am doing it this way for other reasons not relevant to this tutorial, but the procedure remains empirically the same). |
 |
1. |
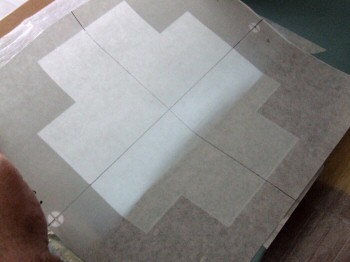
Guide lines.Depending on the type of insignia you are painting you may want to ensure the markings are in line with the profile of the model.
Models with round markings will not need to apply this procedure, but crateful marking and measuring will be necessary to locate the centre of insignia on the model.
Add guide lines to the paint mask using a soft fibre tipped pen or a soft pencil. Do not use too much pressure adding these lines as you could damage the mask substrate!
While marking out the guide lines you should also be considering where the registration pins will be. On a wing you should install them parallel to the spar where there will be a minimum amount of curve on the surface. |
 |
2. |
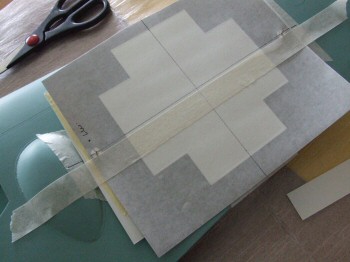
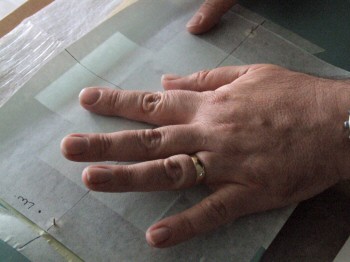
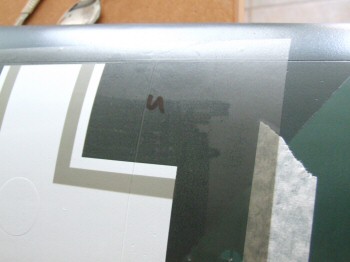
Apply guide lines on the model.Next you need to draw out guide lines on the model surface to align with the marks on the decal. This will give easy positioning of the first mask. Take your time, and don't forget to use common reference points on the model for a handed pair of insignia on each side. That way they should align with each other nicely.
If you have to mark the surface of the model in this process, as in the image opposite, use a soft tipped water based pen that will wash off easily when you have completed marking. Test the compatibility of the pen with a test panel of your paint first.
I have also put some marks on strips of masking tape as you can see. When doing so yourself, make sure the tape will not interfere with the painting process if it is going to remain on the model during the spraying process, and don't forget to use a soft marker! |
 |
3. |
Prepare registration pins.There is a short guide on preparing the registration pins that you should have viewed before starting this workshop. If you have not viewed this please click here.
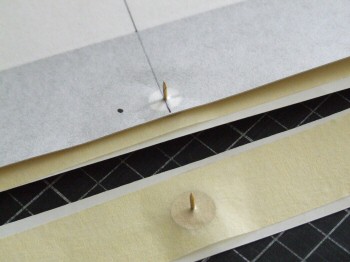
Included with your paint masks will be some strips of silicone paper. Cut the paper into strips a little wider than your masking tape and position centrally under the pin.
Cut a short length of good quality high tack masking tape and lay it over the pin centrally before pushing it down to meet the silicone paper tacky side down (see the bottom pin in the image opposite).
Finally install the registration pin into the registration mark from the back of the mask guided by the pin holes you punched into the registration marks earlier. |
 |
4. |
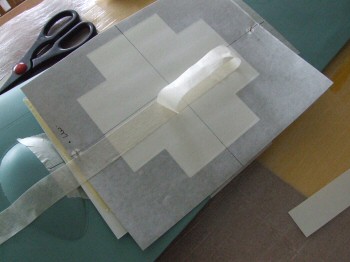
Position the decal on the model.Using the reference marks on the model position the mask carefully into position and hold it down with a length of masking tape. In the image opposite I have used the reference line through the registration marks as the main guide line for the masking tape.
Again take your time and be sure it is positioned correctly before you continue. |
 |
5. |
Install registration pins to model.Pull back the tape from one side of the mask as shown opposite and carefully lift the edge of the mask with the tape and silicone paper. Remove the silicone paper from the masking tape taking care to hold both ends of the exposed masking tape against the mask lower surface. Lower the mask to the surface of the model ensuring alignment is maintained.
Once located correctly rub down the paint mask where the underlying masking tape sits so as to be sure it is firmly affixed to the surface of the model holding the registration pin firmly in position.
For roundels it will be better to locate the centre position on the surface of the model and to affix the registration pin directly to the surface before laying the paint mask over. |
 |
6. |
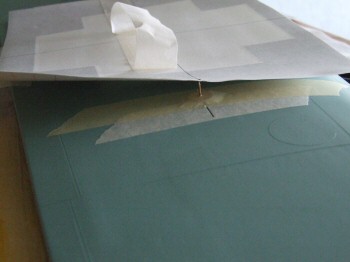
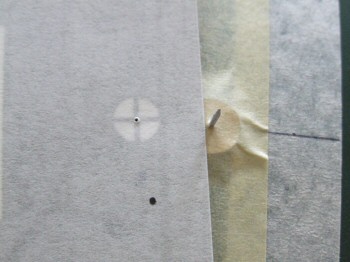
General view of registration pin installation.Here you can see the tape holding the pin in position on the wing. The mask can be lowered into it's exact location by simply locating the registration pin in the corresponding registration hole on the mask.
Finish installation of remaining registration pins that you have for each decal (if any).
If the surface of the model has become dirty and if necessary, remove the paint mask to clean the surface to be painted. Any grease or detritus on the model surface will affect the adhesion of the paint mask and most likely hinder the painting process. Return the mask to the registration marks and for some security, replace the masking tape applied in section 4 above. You are now ready to commit the paint mask to the surface of the model. Be sure everything is aligned correctly as there is no going back after this stage! |
 |
7. |
Exposing one side of the mask for application.From one side of the decal parallel to the registration marks lift the paint mask and application tape layer away from the silicone paper. Pull it back as far as possible until the registration pins or the securing masking tape prevent further separation. Do not introduce any strain so as to cause unnecessary stretching of the paint mask. Secure the exposed paint mask with a small strip of masking tape (as shown opposite) to hold it down.
IMPORTANT: You should avoid touching the exposed paint mask surface as this is the adhesive layer that will fix the paint mask down. Finger prints and other detritus will simply reduce the effectiveness of the mask! |
 |
8. |
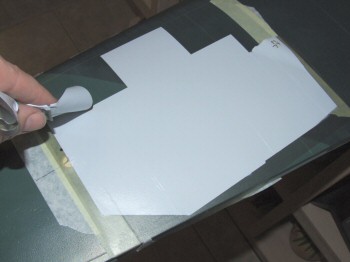
Cut away exposed Silicone paper.Using a good pair of scissors, cut as close to the mask as possible without having to touch the mask. Be careful also not to scratch the surface of your model!
WARNING! Do not use a knife or try to tear the paper as this will yield small particles of paper dust that could interfere with the adhesion (seal) of the mask to the surface. |
 |
9. |
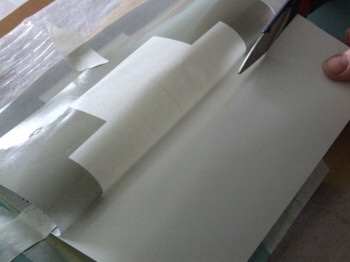
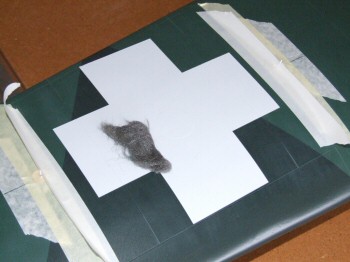
Fixing down the first half of the paint mask.Once the silicone paper is removed you can ease back the mask into position. With your finger, start to rub down the mask from the cut edge of the silicone as seen opposite. Work your finger over all of the mask slowly and smoothly until you have worked your way to the outer edge of the mask.
|
 |
10. |
Exposing the remaining mask.Carefully peel back the opposite end of the paint mask just enough to expose all of the remaining silicone paper. This will involve lifting the mask off the registration pins as shown here. Be careful not to pull the paint mask completely off, and carefully remove the remaining silicone paper from the the paint mask. |
 |
11. |
Re-locate the registration pins.Holding both corner ends of the mask lower the paint mask until you can locate the registration pins in the holes.
IMPORTANT: Do not rub any of the decal down until the mask is fully located on the pins!
|
 |
12. |
Fix down the remaining paint mask.As before begin to rub down the decal wiping to and fro, across the whole decal width, working your way towards the outer edge.
At this point the mask should be fully located on the model surface. I recommend you leave the mask with the application tape on until you have got all of your other masks located on the model for your planned paint process.
Only when you are ready to begin the spray process should you remove the application tape. This ensures the area to be painted remains clean while you continue working on the wing. |
 |
13. |
Removing the application tape.When you are ready to paint, carefully remove the application tape from the paint mask substrate. If there has been any time lapse between fixing the mask down and this stage you should rub down the mask again to energise the tack on the mask.
Remember the paint mask only has a medium tack and you should take care to ensure the paint mask remains affixed to the surface as you slowly pull back the application tape. The best way to achieve a good separation is to pull back the tape at 180° to the surface as shown opposite. Slowly pull the application tape off. I usually do this in 2 sections for tape at each side of the registration pins. |
 |
14. |
Fixing down the edges.The mask is now applied and almost ready. It is strongly recommended you gently but firmly rub down the entire mask edge that borders the paint area to ensure the mask seats firmly in position. You only need to do the first 5mm or so for it to be to be effective.
Use a spoon handle with a rounded face, or alternatively, I know some people use the leading edge of a new propeller. It does not really matter what you use as long as it improves the seal. You will notice the mask takes on a darker colour as it is firmed down in these areas. For panel lines I suggest running your finger nail down the groove to seat the paint mask.
I forgot to take a picture of this stage but took one for section 23 when I was applying the second set of masks.
|
 |
15. |
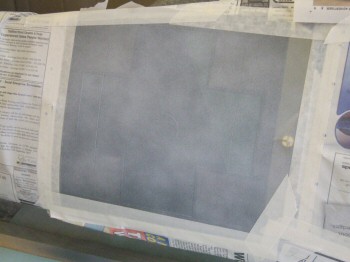
Spraying.Don't forget to mask off the other areas to the side of the paint mask to protect from over-spray. IMPORTANT: Please ensure that any of the mask identification marks cut into the paint mask are also covered over! MOST IMPORTANT: It is necessary to spray the paint as soon as the masks have been exposed and rubbed down. Pictured opposite is a top wing Iron Cross which has received it's first light spray of paint. You must not overload the surface with too much paint otherwise you will encourage some bleeding into the edges where the paint mask sits. This will create large ridges when the paint dries and an unsightly finish. Allow sufficient time for the paint to flash off most of the carrier solvent before you add the next pass of paint. Water based paints can take much longer to flash off due to the low evaporation rate of water. Using Klass-Kote as here, I needed to apply 3 light coats of paint before the area was sufficiently covered. Note: This is why highly pigment paints are recommended for insignia. Higher pigment levels mean thinner films and fewer passes of paint to achieve the desired result. |
 |
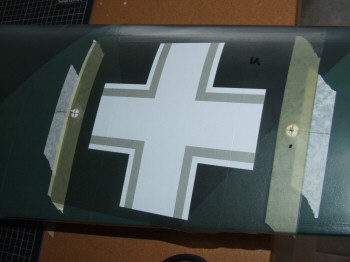
16. |
Completed spray coat.See opposite the paint film after the 3 coats of paint. You should allow the paint to flash off as much solvent as possible before you begin to remove the mask. Using Klass-Kote this paint job only required 1 hours drying before the masks were removed. Water based paints can take 24 - 72 hrs to dry before the paint has dried sufficiently. For guidance on drying times for your paints, see the manufacturers instructions! |
 |
17. |
Removing the mask.I strongly recommend all the supplementary masking material used to protect the model is removed first before you start this process. Begin removing the paint mask carefully. Do not simply lift from one corner and peel off like a sticking plaster. Work your way round the outline of the painted area pulling back the paint mask from the surface at right angles to the painted edge. You should leave a perfect clean crisp edge. |
 |
18. |
Flatten the paint edges.With the mask removed I permitted the paint to dry thoroughly before proceeding. Please see the paint manufacturers instructions for more guidance.
In this example the Klass-Kote was allowed 24 hours before I went around the edge of the white paint to cut back any signs of a lip that may exist. Low pigment paints will have a higher ridge. I used "000" gauge wire wool, but you can use 1000 grit wet & dry if you know what you are doing. It only needs a light rub to remove the lip nothing else!
Notice I also ran 2 lengths of standard masking tape down the sides of the tape used to secure the registration pins. This was there to prevent any risk of damaging the tape from this process and the subsequent solvent wash after the rub down (Klass-Kote thinners). |
 |
19. |
The second colour.With the surfaces prepared for the next stage I got the paint masks for the second "black" coloured layer. As before I pre marked the holes with a pin to make locating the holes easier.
The mask should theoretically slide over the registration pins onto the surface. |
 |
20. |
Fixing the paint mask.As with the first mask you should go through the process of fixing the mask to the models surface.
The procedure is exactly the same. |
 |
21. |
Mid application status.As before be sure the surface is spotlessly clean before you start. |
 |
22. |
Finally applied.This is the top wing with the second paint mask applied ready for the edges to be rubbed down to ensure a good seal around edges.
Optionally you can lift the outer edges of the mask to remove the registration pins and the securing masking tape. This is not strictly required but is an option when you get to the last colour application.
Note. For some insignia it will be necessary to remove the pins as it will sit in the centre of the insignia. For example an RAF roundel will have one registration pin in the centre of the insignia. When you get to the last red colour you need to remove the pin and tape to spray the last colour. Ensure there are no gum residues from the high tack masking tape before painting! |
 |
23. |
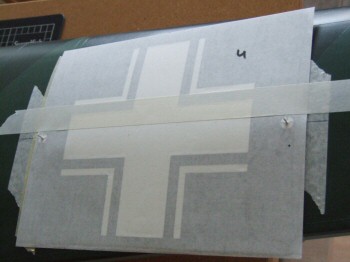
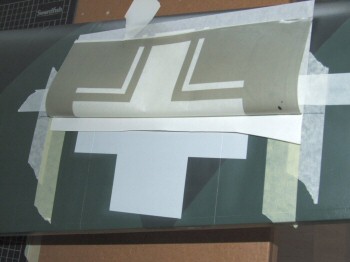
Rubbing down the mask edge.I remembered to take a picture this time! You can see the area that has been given the extra rubbing down below the black "U" in the image opposite. Here I used the rounded edge of a stainless steel spoon handle.
The edge of the mask is 1mm wider than the white mask to ensure the white area gets covered completely.
On the outer edges there is less overlap to reduce the differential. Normally the Iron Cross will be produced "white on black" so this gap would not be necessary. I am spraying this way round for other reasons not related to the insignia application. |
 |
24. |
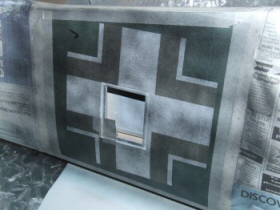
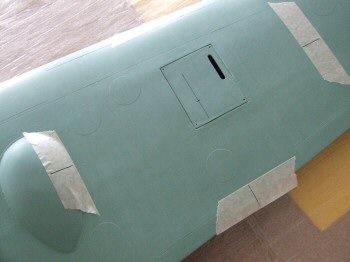
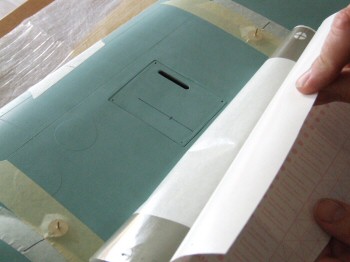
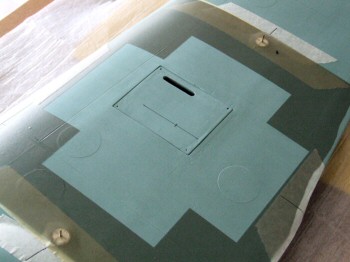
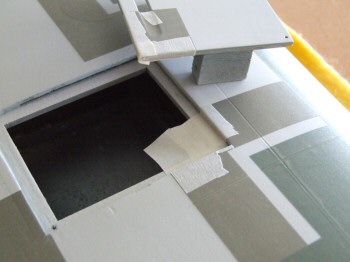
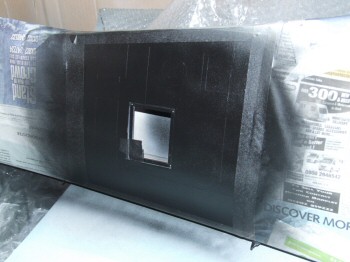
Inspection hatches.On the underside of the wing you could be faced with the presence of inspection hatches or servo doors in the middle of the insignia. I spray the hatches separately to the main area, but during the same spraying session to ensure a similar build of paint.
You should apply the mask with the inspection hatch installed. When the mask is fully applied, cut around the hatch entrance to free the hatch. Remove and wrap small strips of masking tape around the edges of the hatch and into the recess in the wing. The fine ridges made by the panel lines were once again pushed down by rubbing a finger nail down the gully.
Tip: Make sure the inspection hatch is the correct way round before you start applying the mask. I have seen it done! |
 |
25. |
Spraying colour #2.Begin the spraying process building up the layers of paint. Anyone familiar with Klass-Kote will know how light this coat of paint is! As before the paint was built up over 3 applications to ensure just enough paint was used to over-cover the white paint.
|
 |
26. |
Colour #2 finished.Three coates of paint later and this is the result. Time to let the paint dry before removing the mask |
 |
27. |
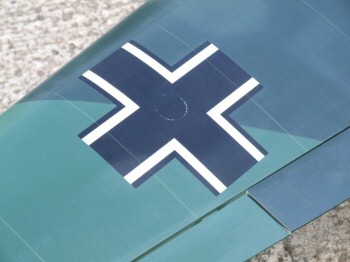
The finished item.After the mask is removed give the insignia one final light rub over with "000" wire wool (optional) and the job is finished.
Perfect insignia every time! |
 |
If you have any questions at all related to paint mask application please do not hesitate to send me a message - Click here.